Manage and debug Kubernetes manifests with Monokle by Kubeshop
5 min read

Managing Kubernetes manifests is hard. Let's say you have a large Kubernetes manifest file. It's going to get a bit overwhelming to manage it. In addition, figuring out how various objects are linked together will make debugging difficult.
About Monokle
Monokle is an open-source desktop UI for managing Kubernetes manifests. You can improve your workflow with Monokle, which allows you to get a high-level overview of your manifest files, resources, and relationships.
Feature overview
- It helps you visualize and navigate the resources in your clusters.
- If you don't want to look up the YAML syntax every time you want to make a change, Monokle allows you to edit your resources and refractor those to maintain integrity easily.
- It also supports Kustomize and Helm, using which you can preview and debug your resources.
- You can also compare resources in your cluster to the ones defined in your manifest files and make changes immediately.
Download and install
You can download Monokle from the GitHub repository. It's open-sourced, so you can contribute as well, give your feedback and check out the product roadmap.
Navigating the dashboard

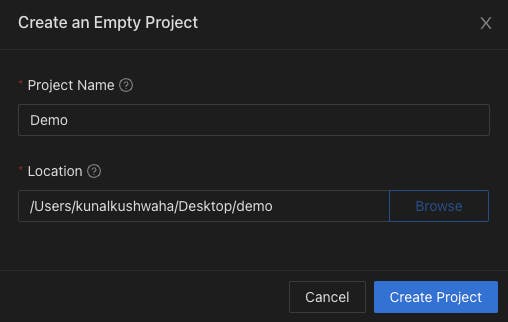
Before we dive deep into the features, let's create a project from the home screen or open up an existing one such as:

Adding clusters
You can add clusters to examine or explore the manifest files as well. Let's see how we can do that.
Exploring local manifest files
You can explore local manifest files in Monokle easily. This can be done in the following way:
- Go to the FILE EXPLORER section on the left-hand side.
- Open up the folder that consists of the Kubernetes manifest files.
Adding local clusters
By default, Monokle checks for the kubeconfig file in the folder ~/.kube/config. If you have minikube installed on your system, click on LOAD in the dashboard next to where it says minikube:

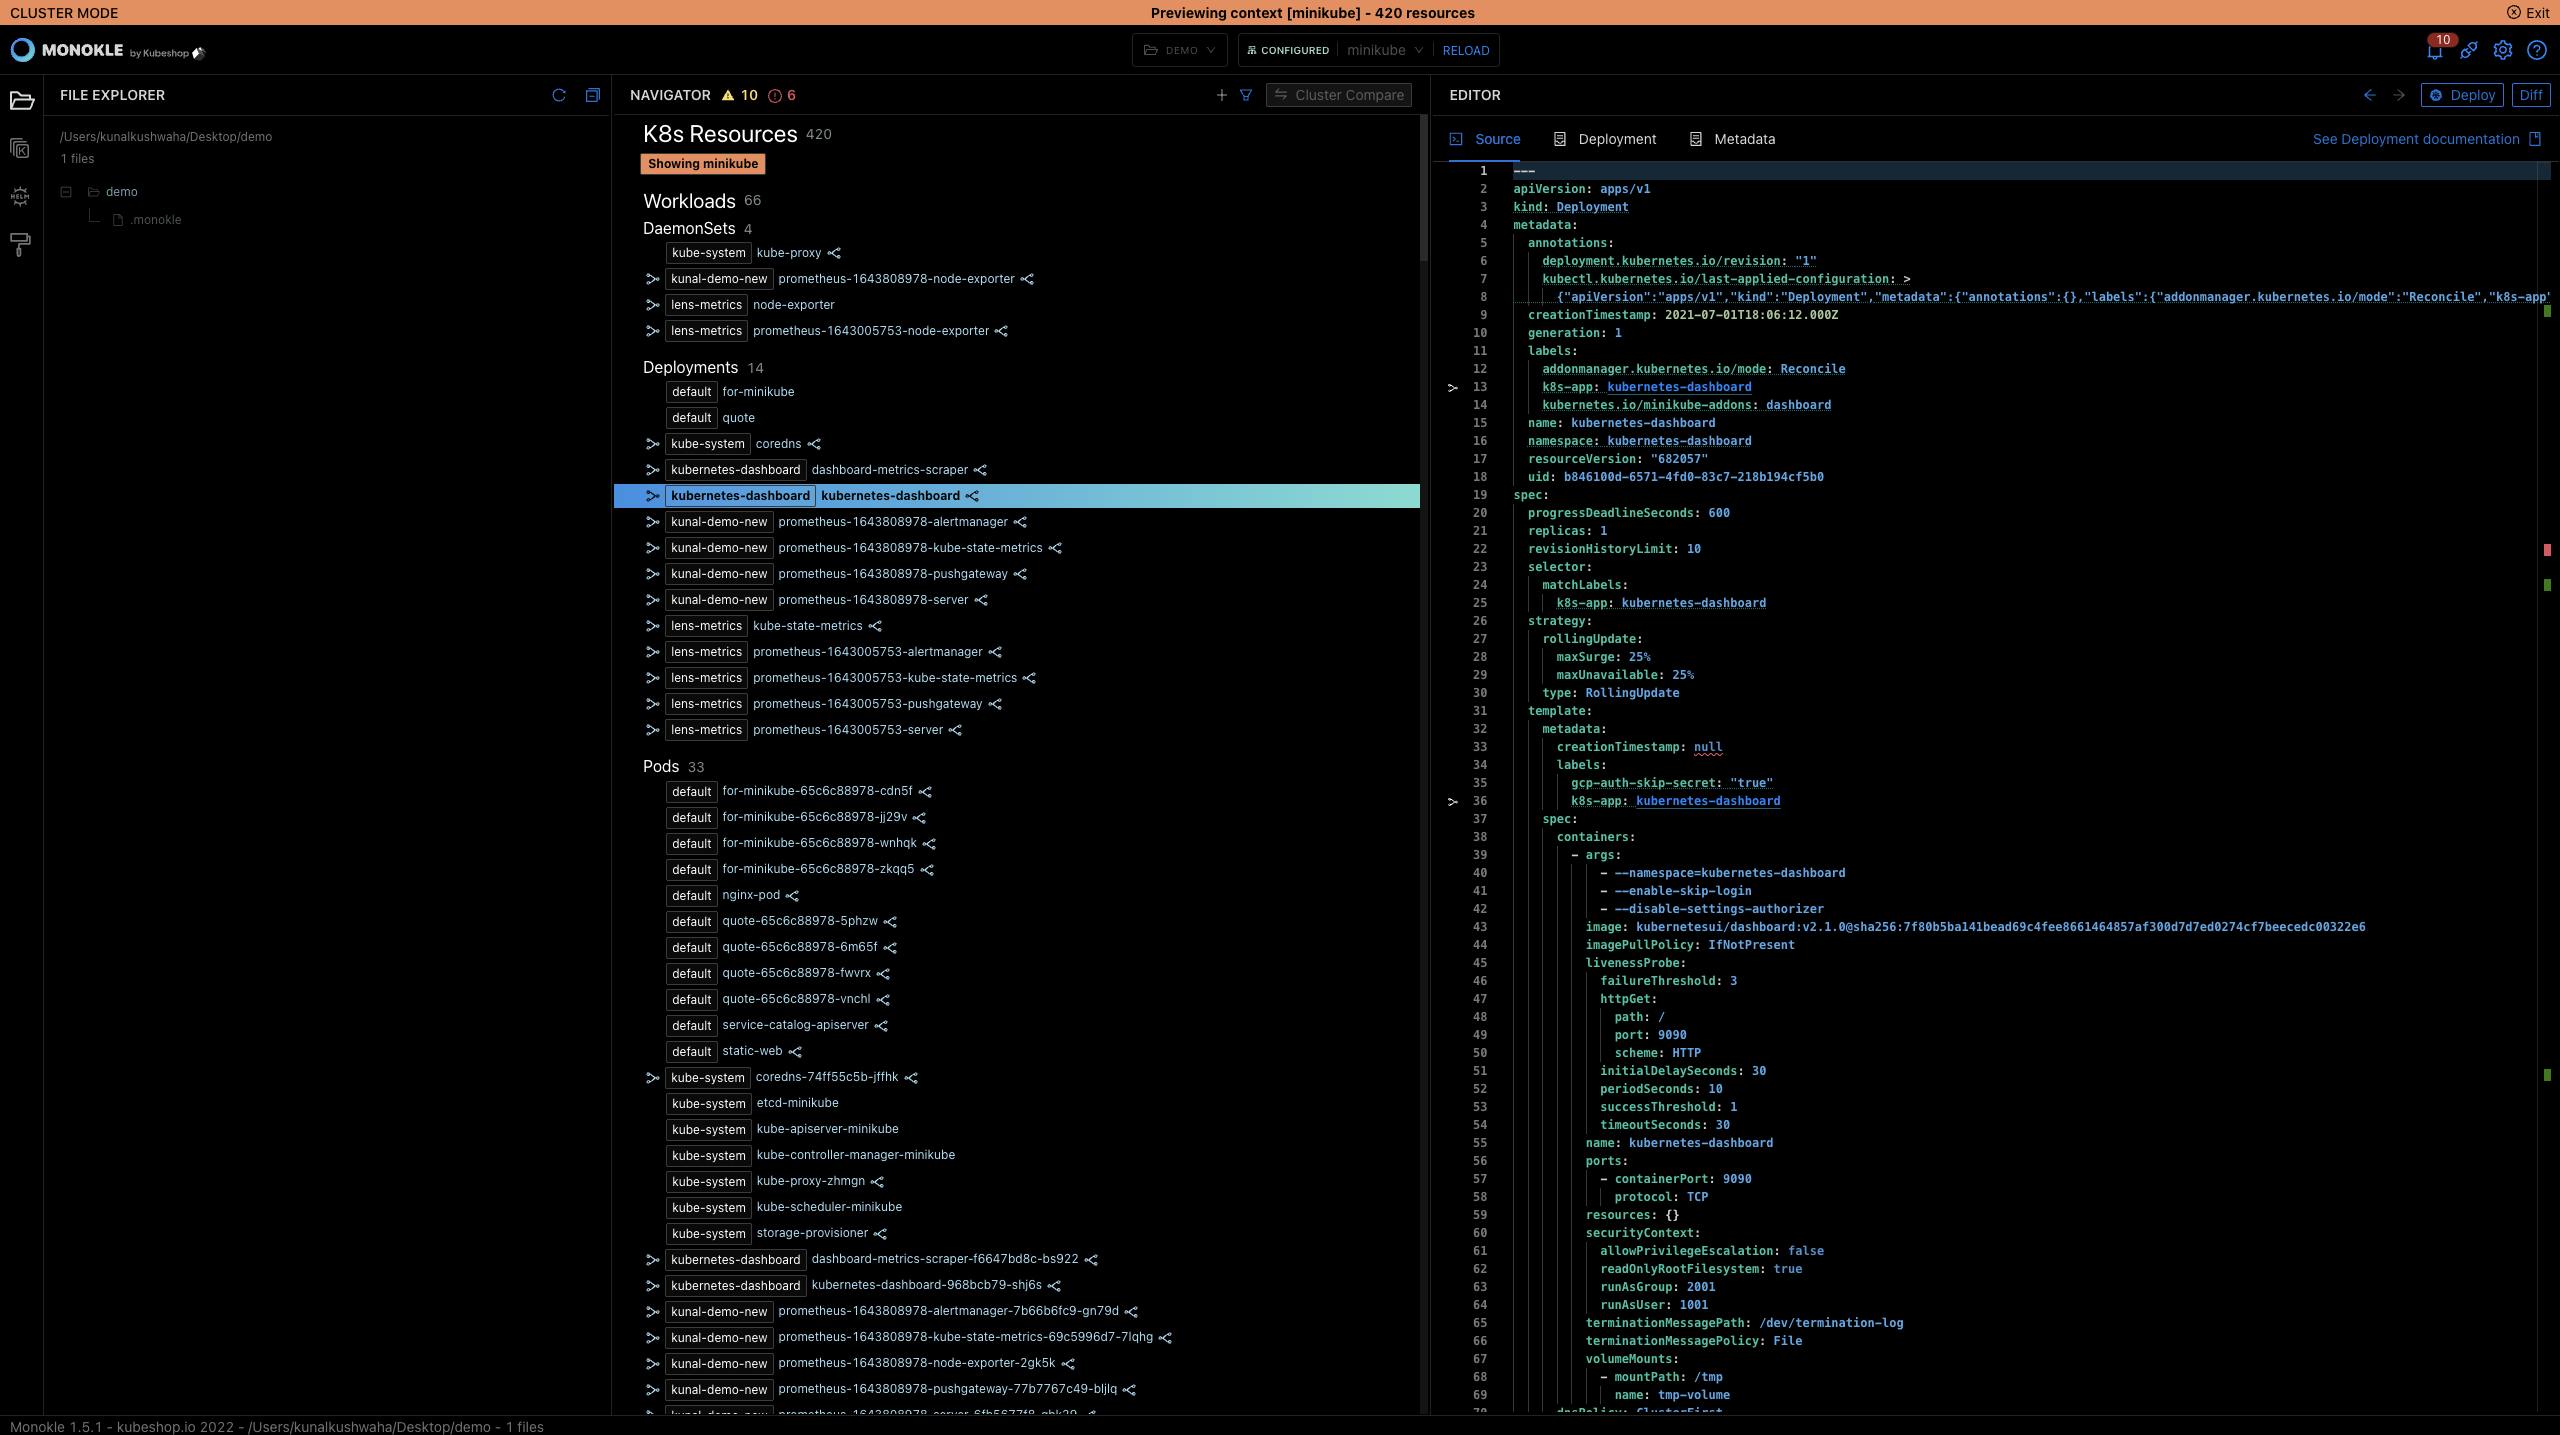
The UI will now switch to cluster mode, and you'll be able to see your resources in a well-formatted way.

Adding cloud clusters
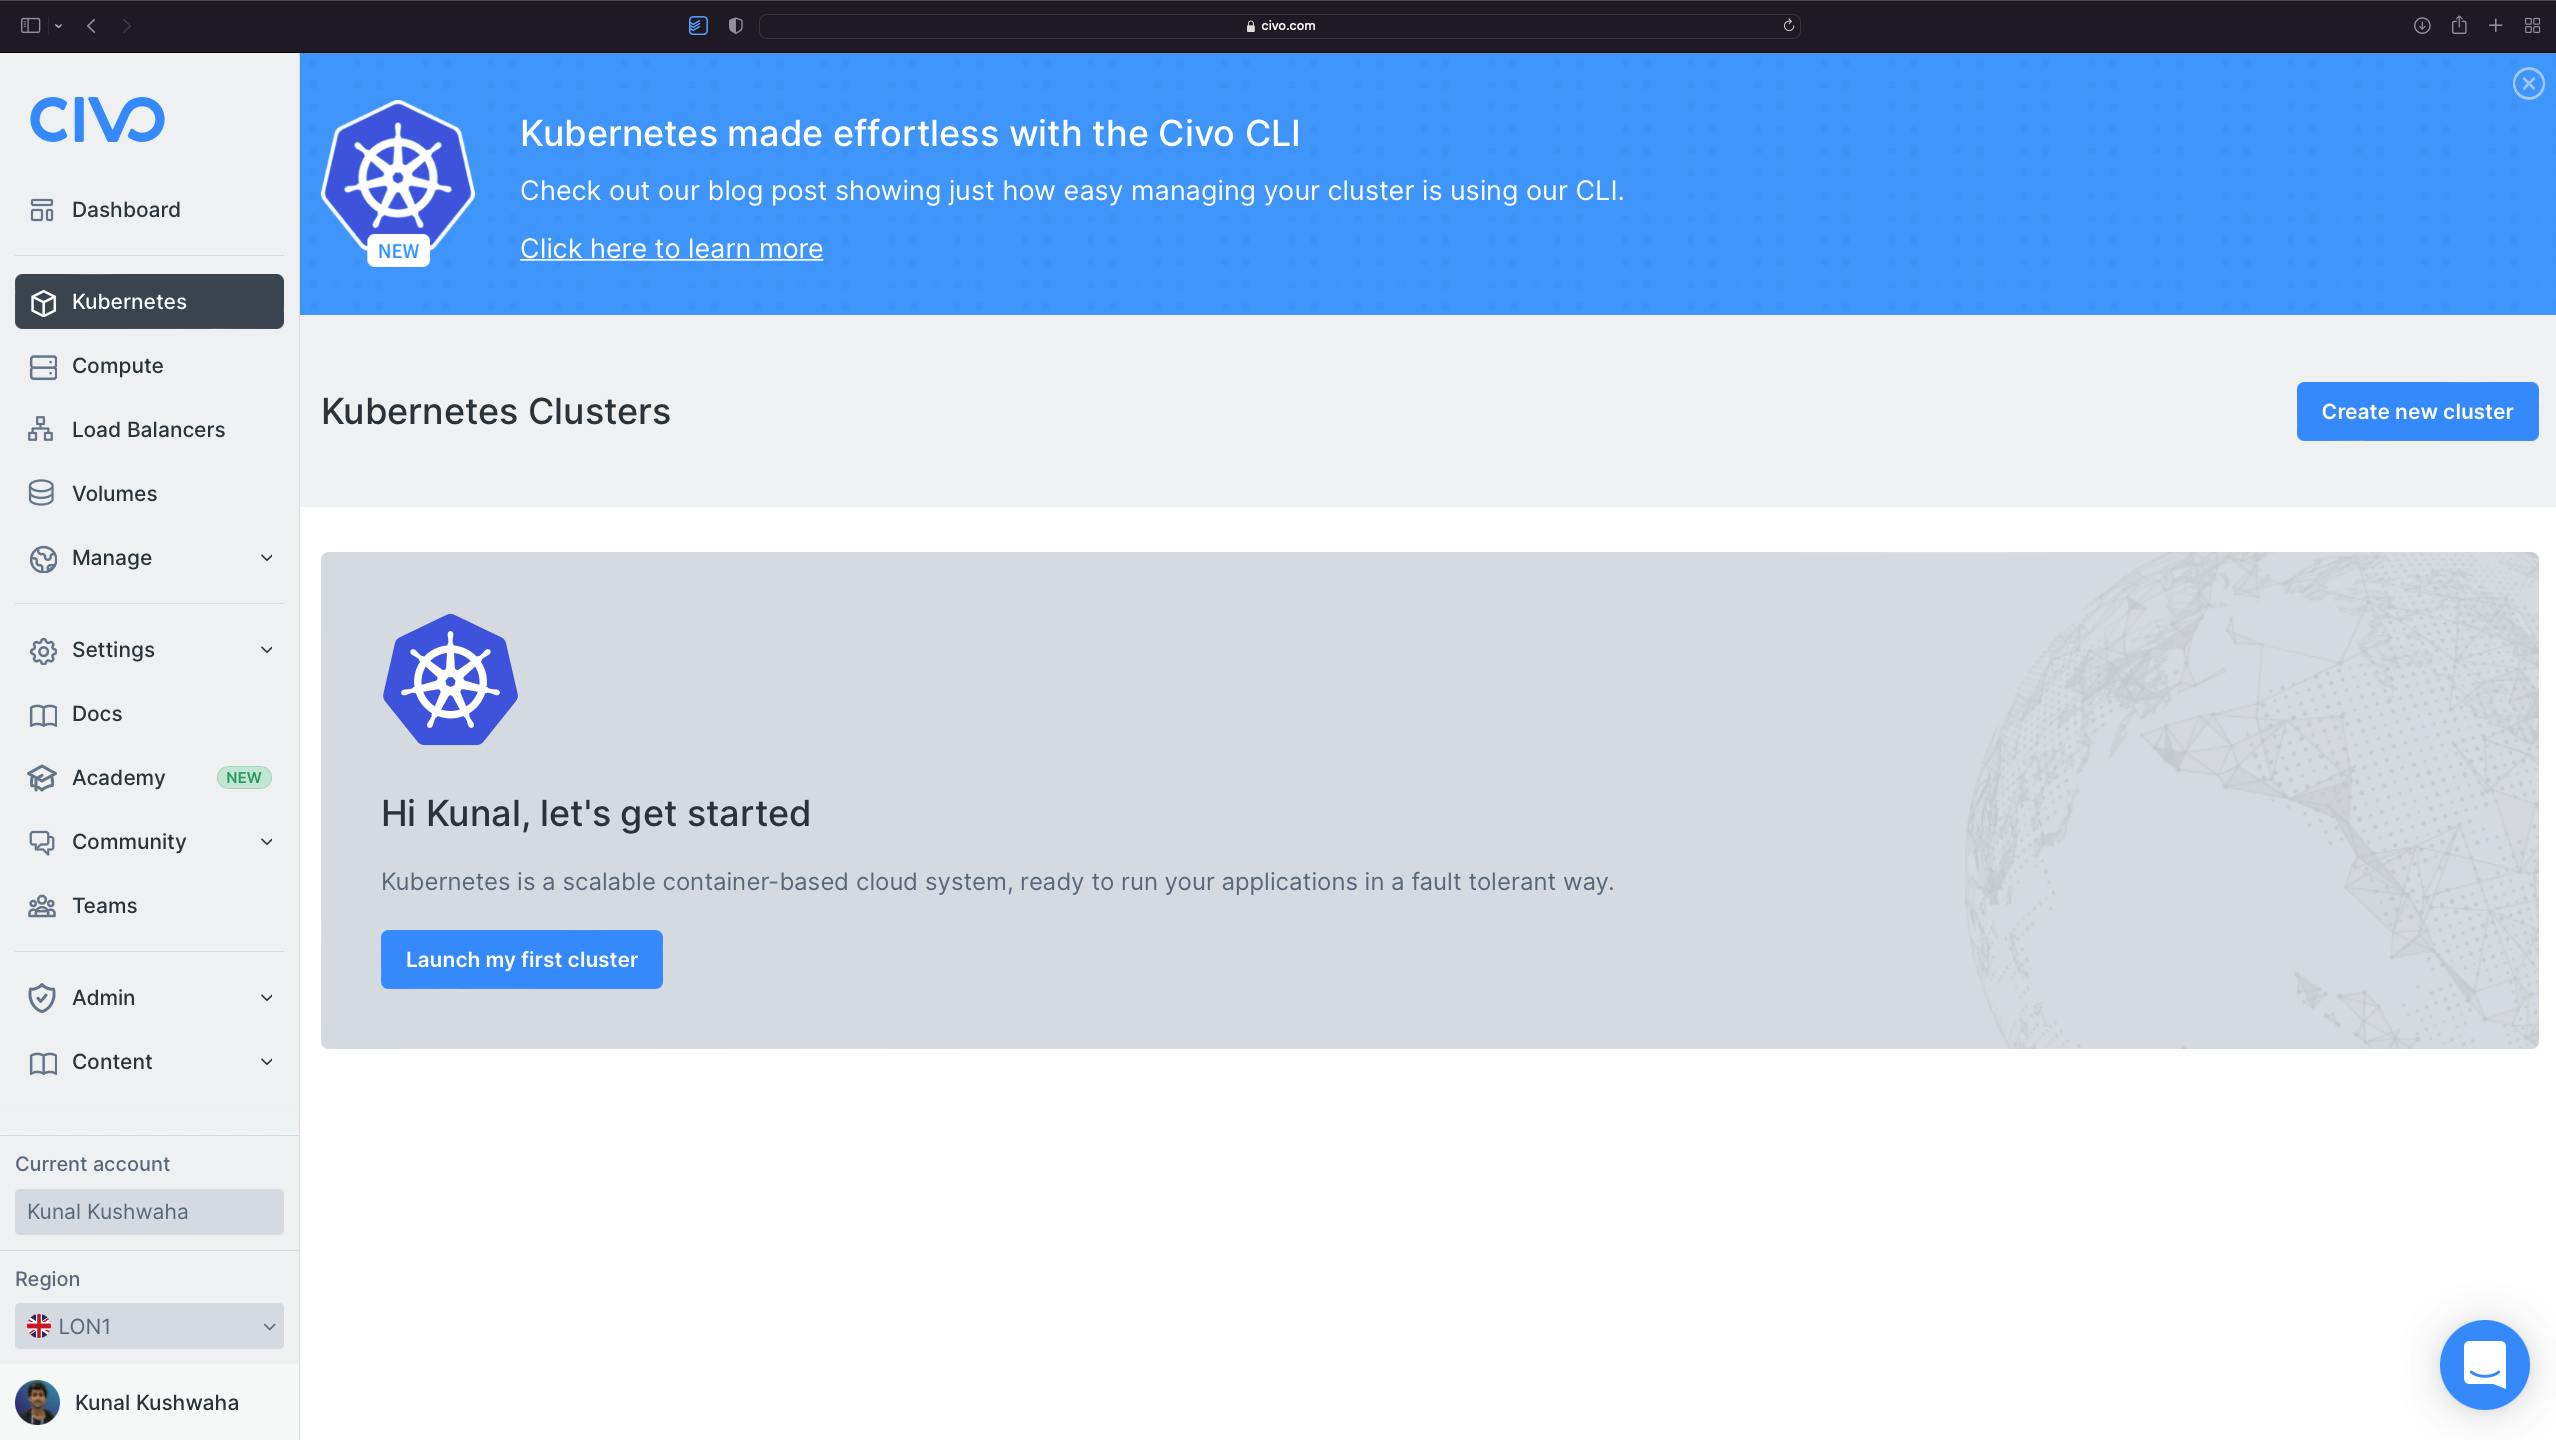
I will create a Civo Kubernetes cluster to connect to Monokle. After signing up, head over to the Civo Kubernetes dashboard.

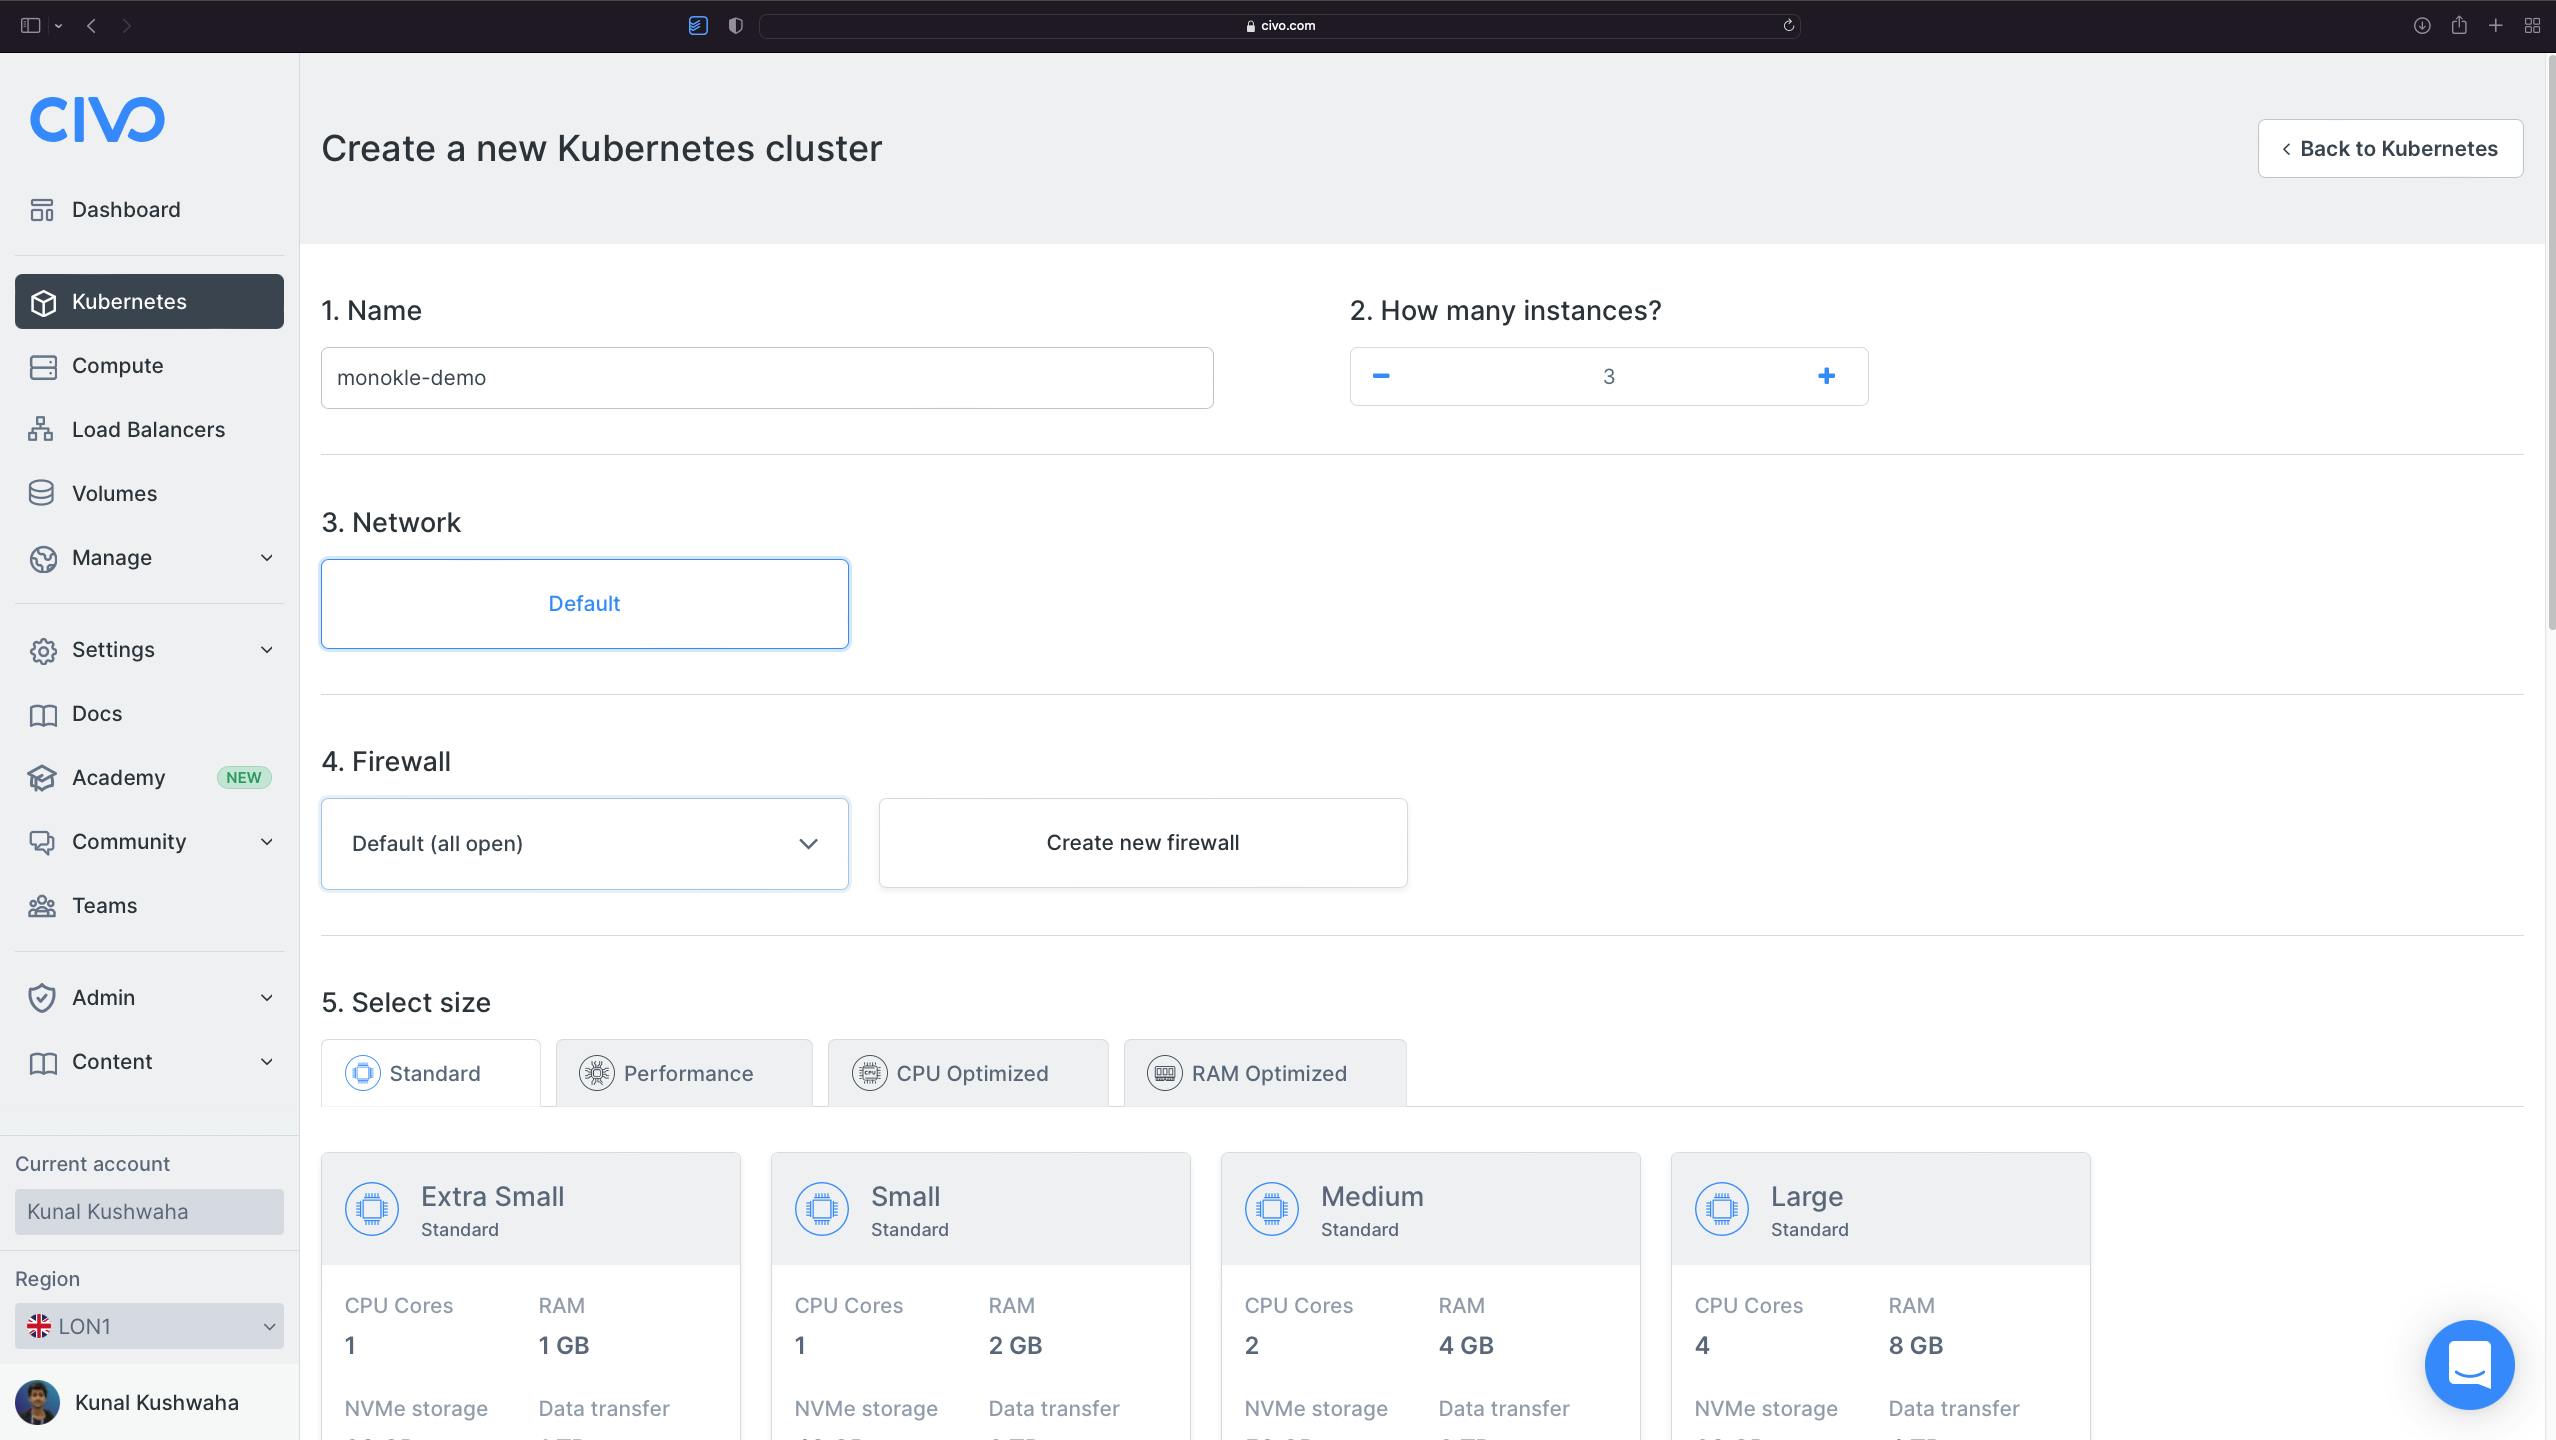
You can create a Civo Kubernetes cluster in 90 seconds with just a few simple clicks:

Download the kubeconfig file and add it to the KUBECONFIG folder path in Monokle settings.
NOTE: Doing this will not update this cluster in your home directory's kubeconfig file.
UI overview
Let's take a look at the various UI components of Monokle.
Dashboard

- On the left-hand side, you can see a vertical toolbar that would allow you to navigate between File, Kustomize, Helm, and View Template mode. The File Explorer that can be seen in the screenshot shows the current manifest folder you have opened.
- The Navigator in the center shows all the resources found in the folder or cluster.
- If you need to work with YAML, you can do so by heading over to the Editor section on the right. Here you can also find GUI options to manipulate your YAML files, including a Deploy and Diff button.
- In the top right corner, you can view:
- the notifications
- plugins manager
- help section includes links to the documentation, GitHub, and Discord server.
- settings (covered below)
Settings
You can click on the top right Settings option to bring the pop-up for tool settings. Here you can find various properties such as PATH for kubeconfig, project settings, extensions, and more.

You can learn more about the individual settings here.
Features demo
Let's explore some of the features that Monokle has to offer.
Navigate Kubernetes objects
Get an overview of your resources from the manifest files/clusters in the Monokle NAVIGATOR. It also allows you to filter your resources and validate the following links throughout your manifests.
Filter resources

Resource links

Preview resources by Helm and Kustomize

You can also preview the resources generated by Helm or Kustomize, allowing you to navigate and debug your resources and apply them to your cluster when you feel appropriate.
Warnings
 Warnings are available when you select a resource, as Monokle will show you where that resource is defined. In addition, the warning sign will indicate that a resource is pointing to a link that does not exist.
Update your cluster
You can easily update the resources in your cluster in the following ways. First, you have to load the cluster you want to work with. After which, you can create your manifests, make changes and click on the Deploy button as shown in the screenshot below.

Doing so will generate a pop-up menu that will allow you to select the namespace you want to create your resource.

Click on OK, and doing so will create your resources in your desired cluster.

Work with multiple projects

You can easily switch in between projects to more efficiently work with multiple projects at the same time.
Templates

You can use Monokle Templates to create forms that users can use to create various Kubernetes objects with the help of a friendly UI. This will generate a YAML file for you as well.
Learn more about it in my tutorial.
Cluster Compare

In scenarios when you may want to compare your local resources to the ones in your cluster, you can use the Cluster Compare functionality. It allows you to:
- See which of your local resources are different in the cluster.
- Replace your local resources with the ones from the cluster.
- Deploy your local resources to the cluster.
- Compare the cluster resources to the Helm chart and Kustomize previews.
Here's how to get started:
- Navigate to your folder that contains the K8s manifests / Kustomizations / Helm charts.
- Preview the files.
- In the Cluster tab to the left, select the desired cluster context.
- Press the "Cluster Compare" button at the top of the Resource Navigator.
